 Dennis Donchev
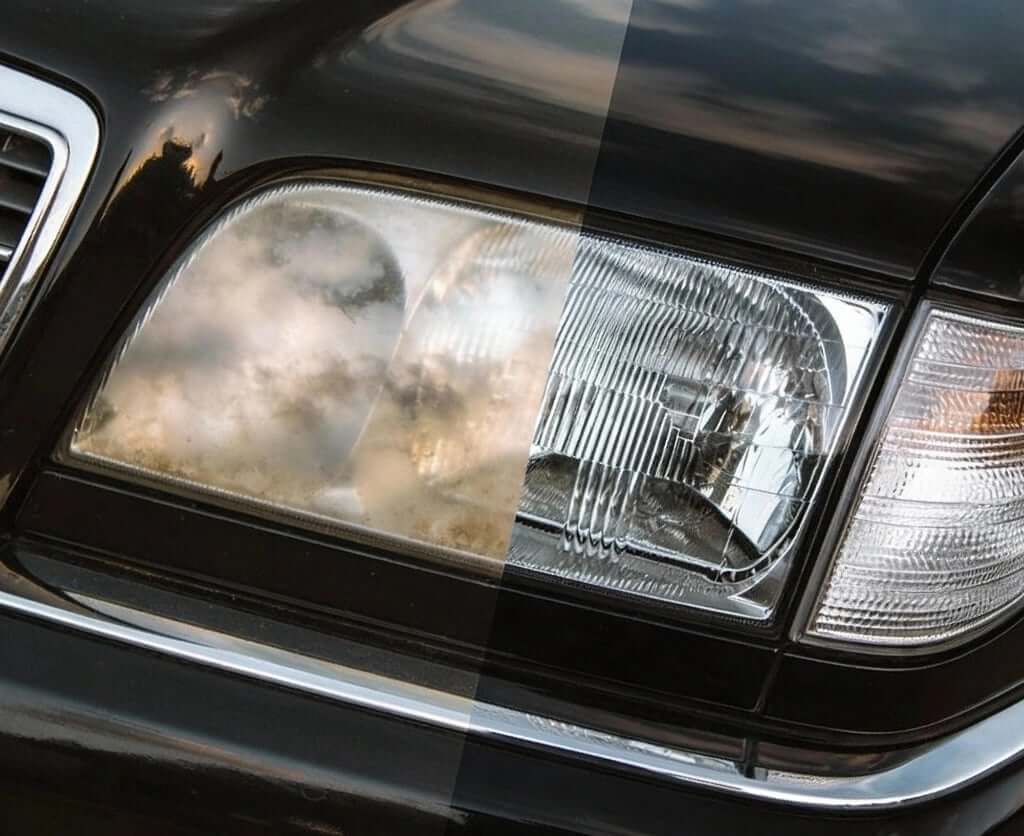
Imagine that you’re driving south on the 5 at night. The marine layer (that thick, foggy air that rolls in from the ocean) is settling in. Your headlights look like someone smeared Vaseline on the inside of them, and you can barely see 40 feet ahead. This is exactly where headlight restoration comes in, bringing back that clear, bright beam.
Does this sound familiar? You’re not alone. Cloudy, yellow headlights are a common car problem in San Diego, but most people neglect them until it gets dangerous. This guide talks about:
– why it happens
– if you should fix it yourself
– what a pro does
– how long the results last
– and when you should just replace the whole thing
Why Do Headlights Get Foggy?
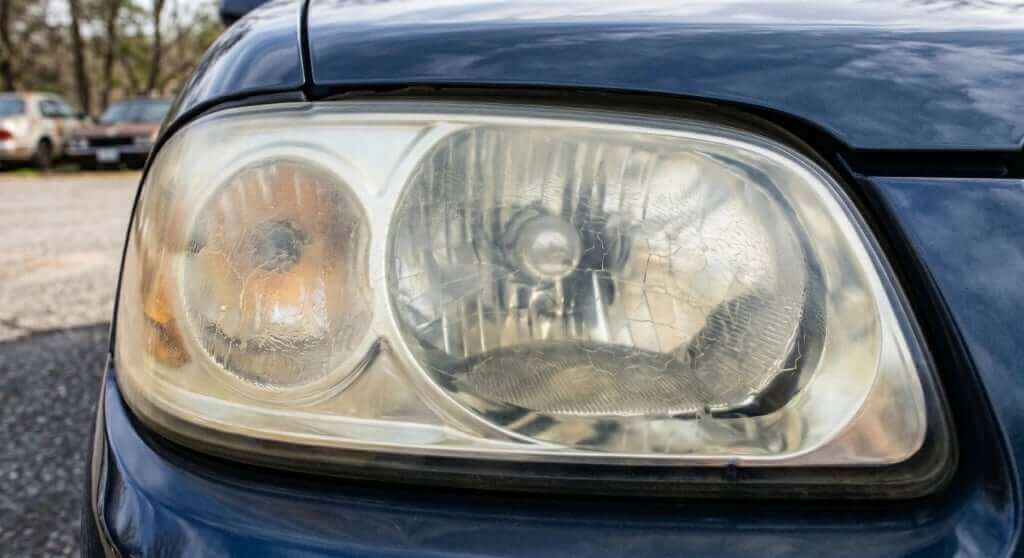
Your headlight covers are made of a plastic called polycarbonate. When the car is brand new, this plastic is crystal clear.
What’s polycarbonate? It’s a tough, lightweight plastic that’s used in a lot of things, such as eyeglass lenses, phone cases, and even bulletproof glass. It’s super clear when it’s new, but it hates sunlight.
The problem? Sunlight is its enemy.
When your car is built, the factory puts a protective clear coat on top of the plastic. Think of it like sunscreen for your headlights. But just like sunscreen, it doesn’t last forever.
Once that coating wears away, the UV rays from the sun start attacking the plastic underneath. The plastic “sunburns.” It turns yellow, gets tiny cracks and dents in it, and instead of shining a clean, bright beam, your headlights start scattering light in every direction like a dusty flashlight.
San Diego makes this worse. Our summer UV index hits 11, which is rated “extreme.” Add the salty air from the ocean, and the moisture from the marine layer, and your headlights are basically aging on fast-forward. Cars parked near the beach in Pacific Beach or Ocean Beach? They get hit the hardest.
🔍External Oxidation vs. Internal Moisture
Not all foggy headlights are the same. Before you buy a kit or book a service, you need to know which problem you’re dealing with.
External oxidation is what most people mean when they say foggy headlights. The most common one:.
- The outside of the headlight looks yellow or hazy
- If you run your finger across it, it feels rough or gritty
- Caused by sun damage
- Can be fixed with sanding, polishing, and a protective sealant
Oxidation. When a material breaks down after being exposed to UV light or air over time. It’s basically what happens when metal rusts, except on plastic, it turns yellow instead.
Internal moisture is a whole different problem that often gets misdiagnosed.
- Happens when the rubber seal around the headlight wears out or cracks
- Water gets trapped inside the headlight
- Looks foggy from the inside, not the outside
- Cannot be fixed with a polish kit. The headlight needs to be replaced or resealed.
| Quick Diagnostic Tip: Run your finger across the headlight. Rough? That’s external oxidation. Smooth but still looks foggy? Moisture is probably trapped inside. |
How to Clean Foggy Headlights: DIY Methods Ranked
There’s a ton of advice online about headlight restoration. You will find dozens of DIY hacks. Some are safe. Some of it works. Some of it doesn’t. And some of it can actually make things worse. Here’s an honest look at the most popular methods, from worst to best.
Most customers bundle headlight restoration with full car detailing in San Diego and save the second trip.
1. Toothpaste or Baking Soda (Temporary Fix and Not Recommended)🚫
This technique is the most common DIY method online. Yes, it works. The tiny scrubbing particles in toothpaste can buff off some of the surface haze, and your headlights will look a little better right after. However:
-
It does not restore UV protection
-
Results fade in 1–4 weeks
-
Cloudiness returns quickly once the lens is exposed to sunlight again
It’s not a solution. It’s a preview of what an actual solution could look like. Essentially the “let me just turn it off and on again” of car care. Don’t waste your time unless you just need them to look okay for one night.
2. Bug Spray or DEET (Never Do This) 🚫
This is one of those internet “hacks” that refuses to die. The idea is that DEET, the active ingredient in many bug sprays, can somehow clear up cloudy headlights. While it might look like it works at first, it’s only a temporary illusion:
- Temporary “fix” that usually lasts only about a week
- DEET chemically softens the headlight plastic and can cause permanent damage to the lens surface
- Often makes headlights look worse over time
This method is not a safe or recommended restoration method. Your headlights are not bugs. This should be avoided completely.
3. Wet-Sanding Kits (Best DIY Option) 🏆
DIY kits from brands like 3M, Sylvania, Cerakote, and Turtle Wax are the most effective consumer-level option. According to Consumer Reports testing, a proper wet-sanding kit can restore clarity that lasts 6 to 12 months.
Here’s how the process works:
Step 1: Tape off the area
Cover the paint and trim around your headlights with masking tape so you don’t accidentally scratch them.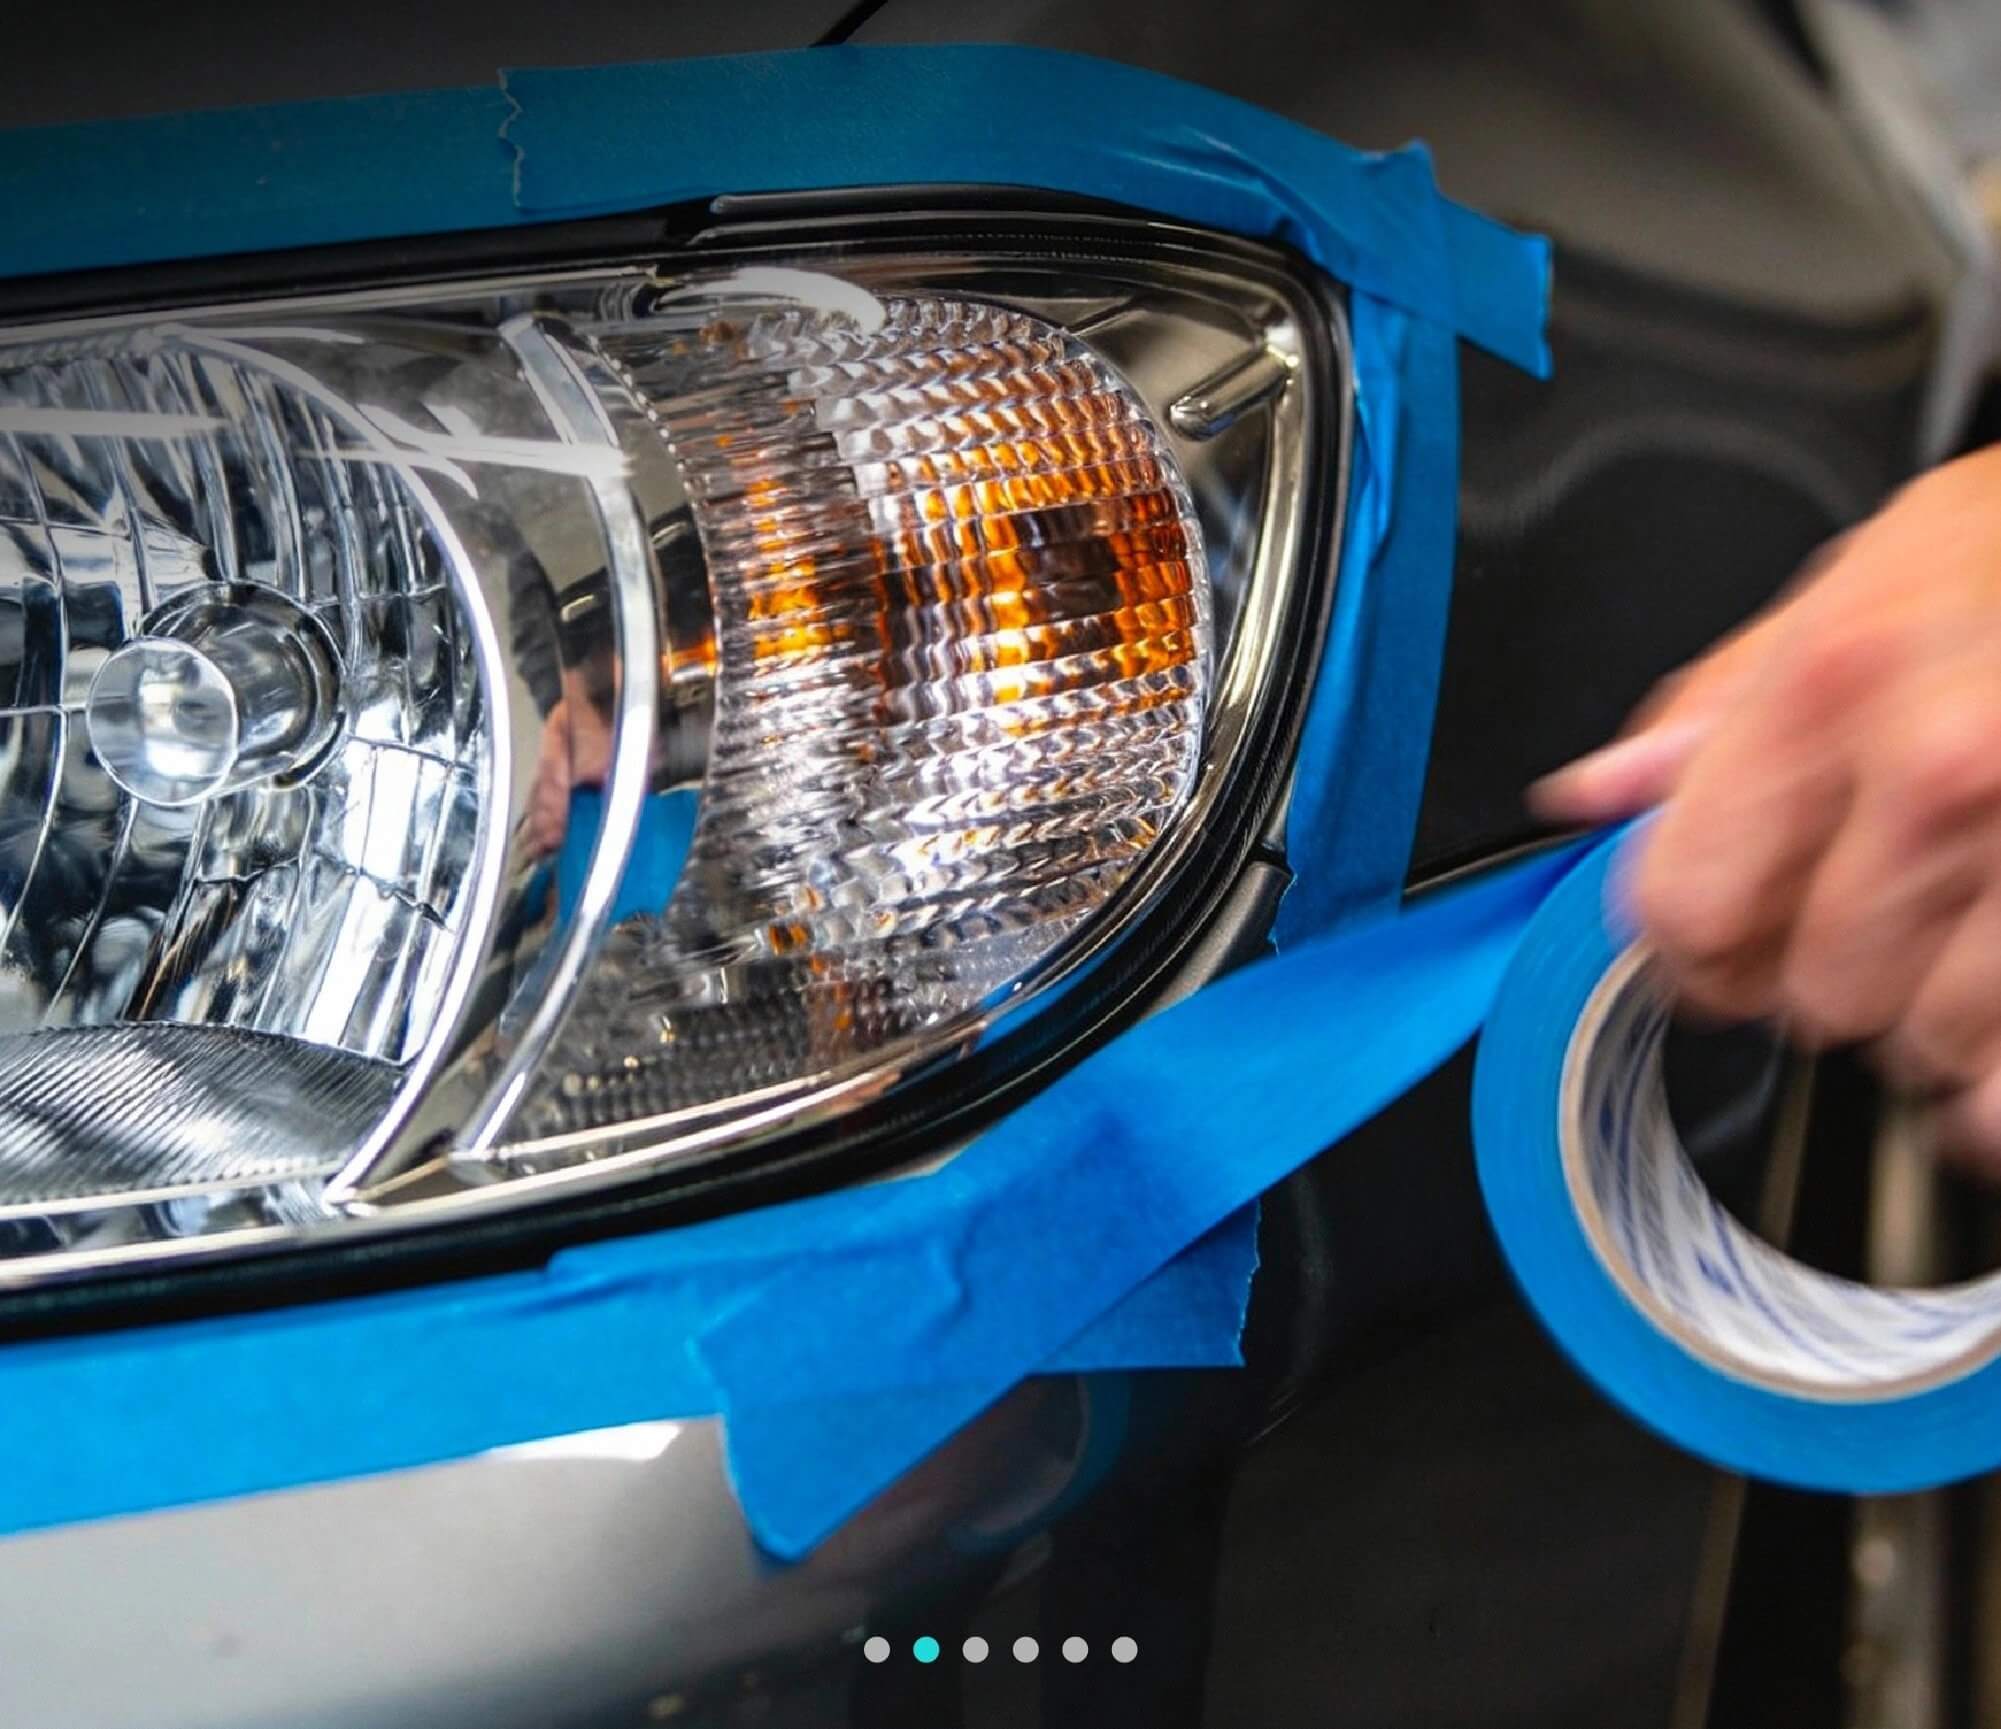
Step 2: Wet sand
You sand the headlight with special sandpaper that gets finer and finer (usually from 1000 to 3000 grit). This removes the cloudy, damaged outer layer.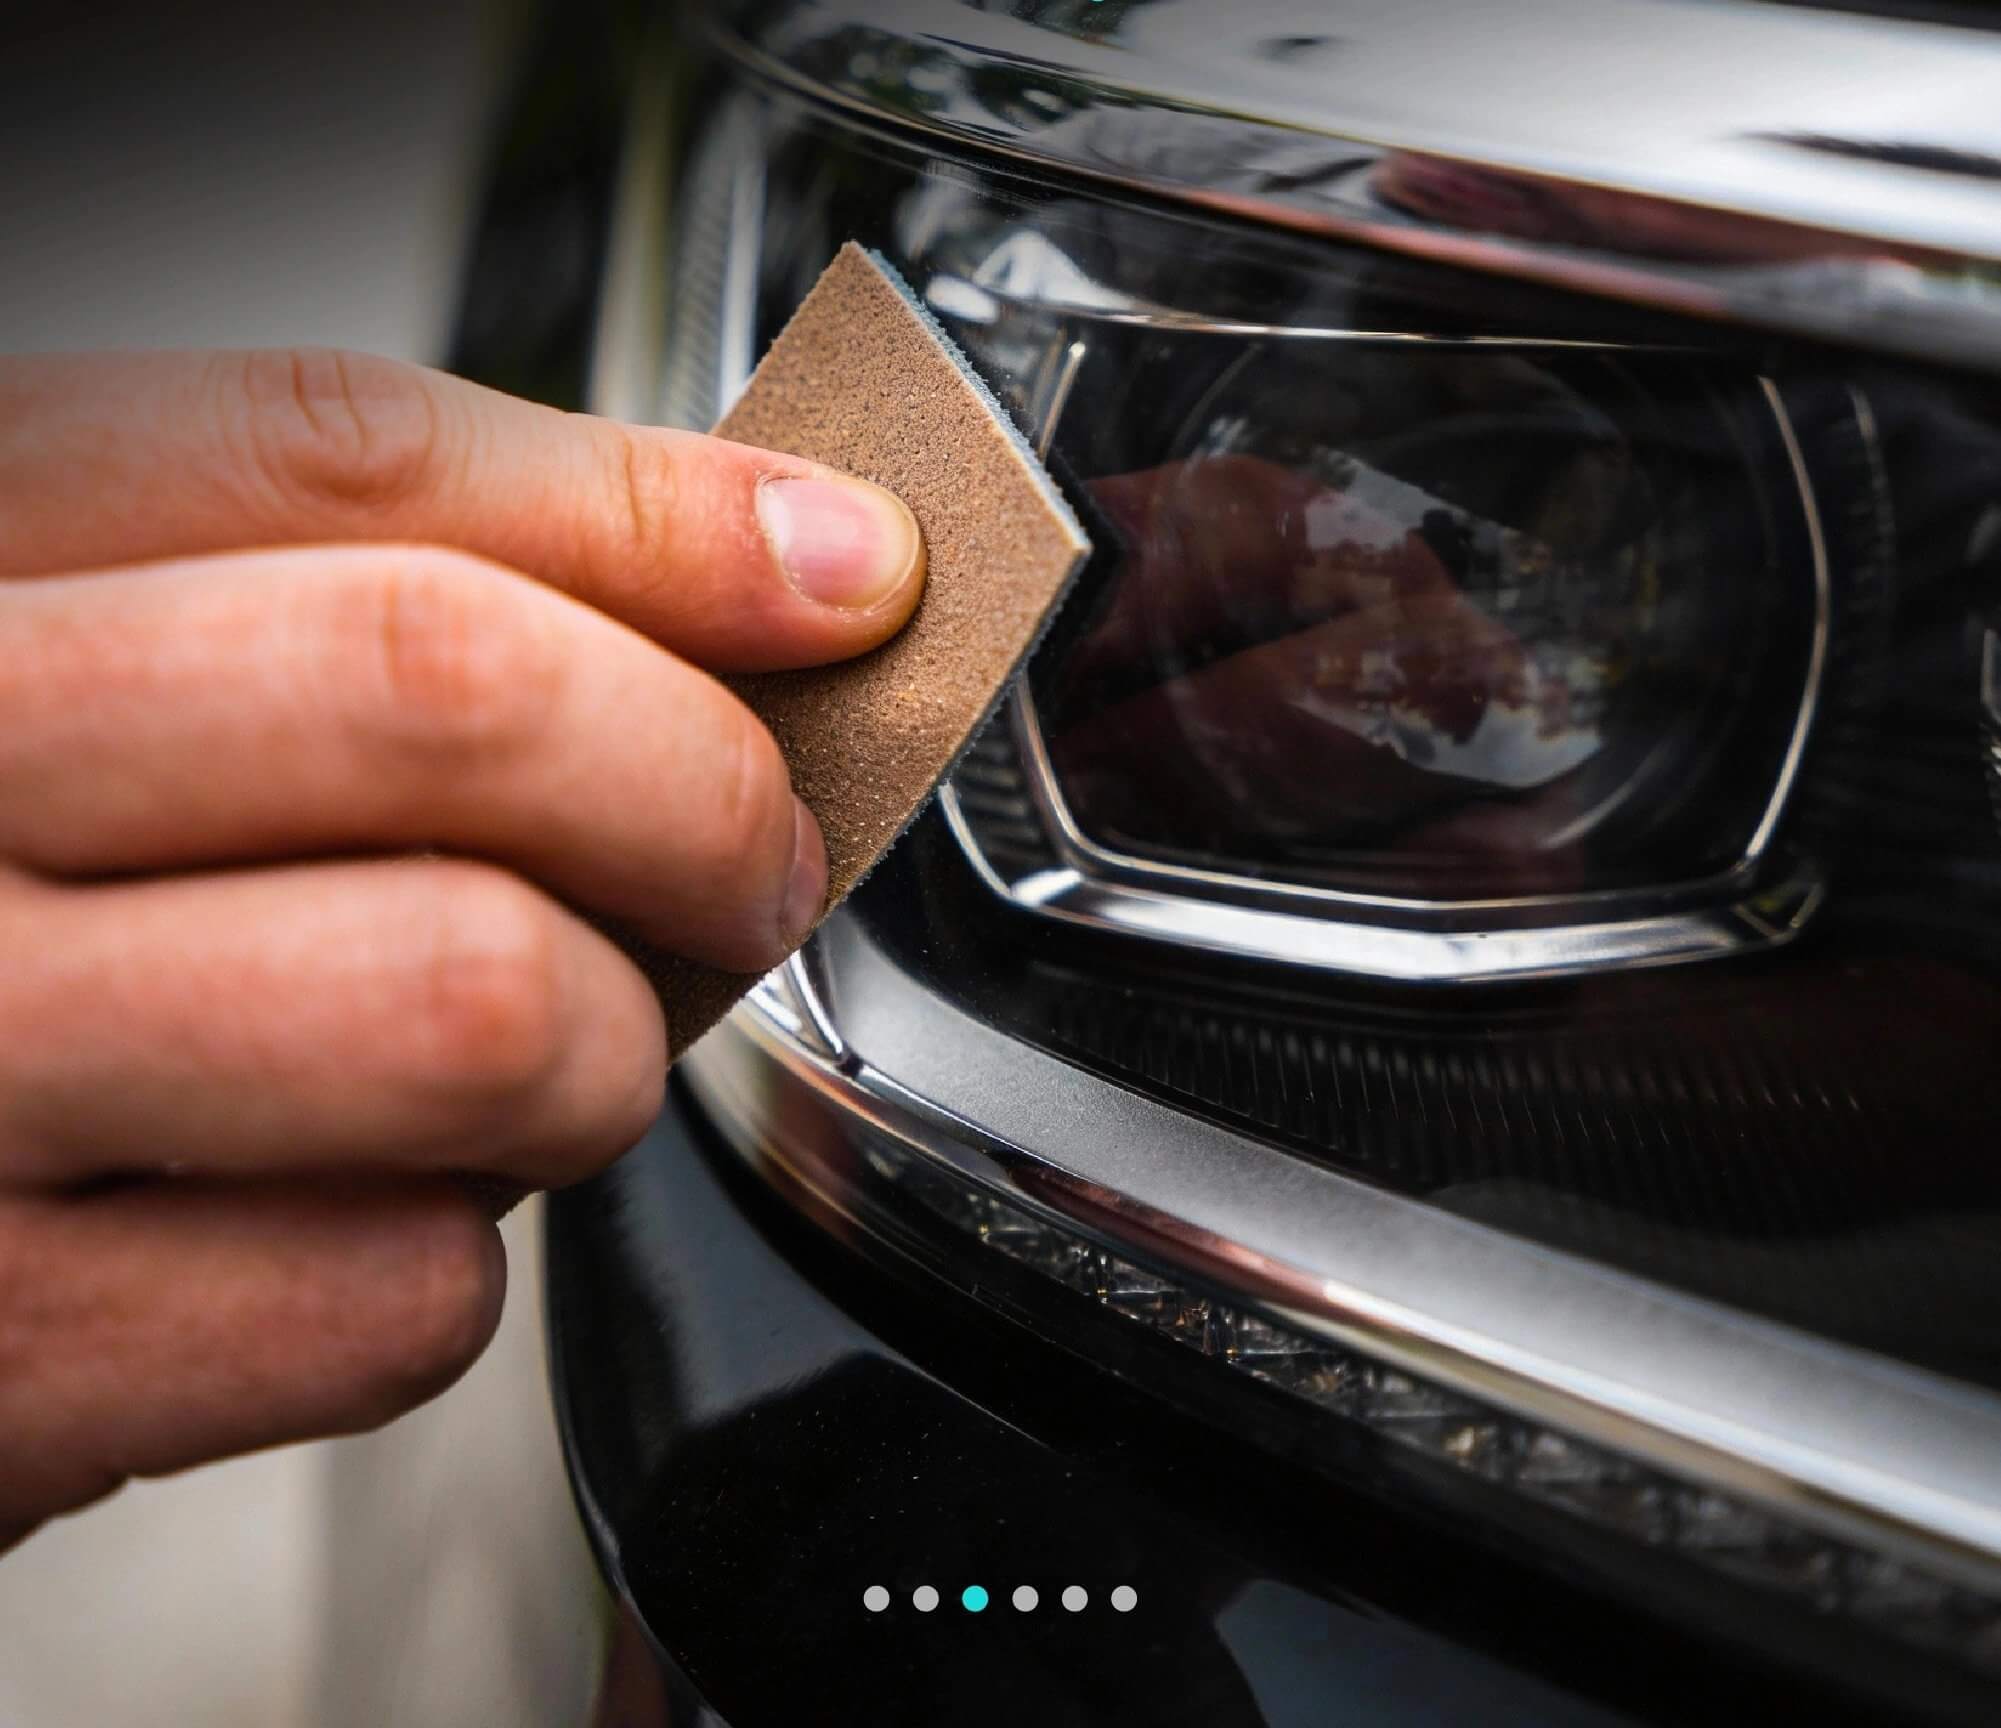
What’s “grit”? It refers to how rough the sandpaper is. Lower number = rougher. Higher number = smoother. You start rough to remove the damage, then go smoother to polish it up.
Step 3: Polish
After sanding, you buff the headlight with a polish compound to bring back the clarity and shine.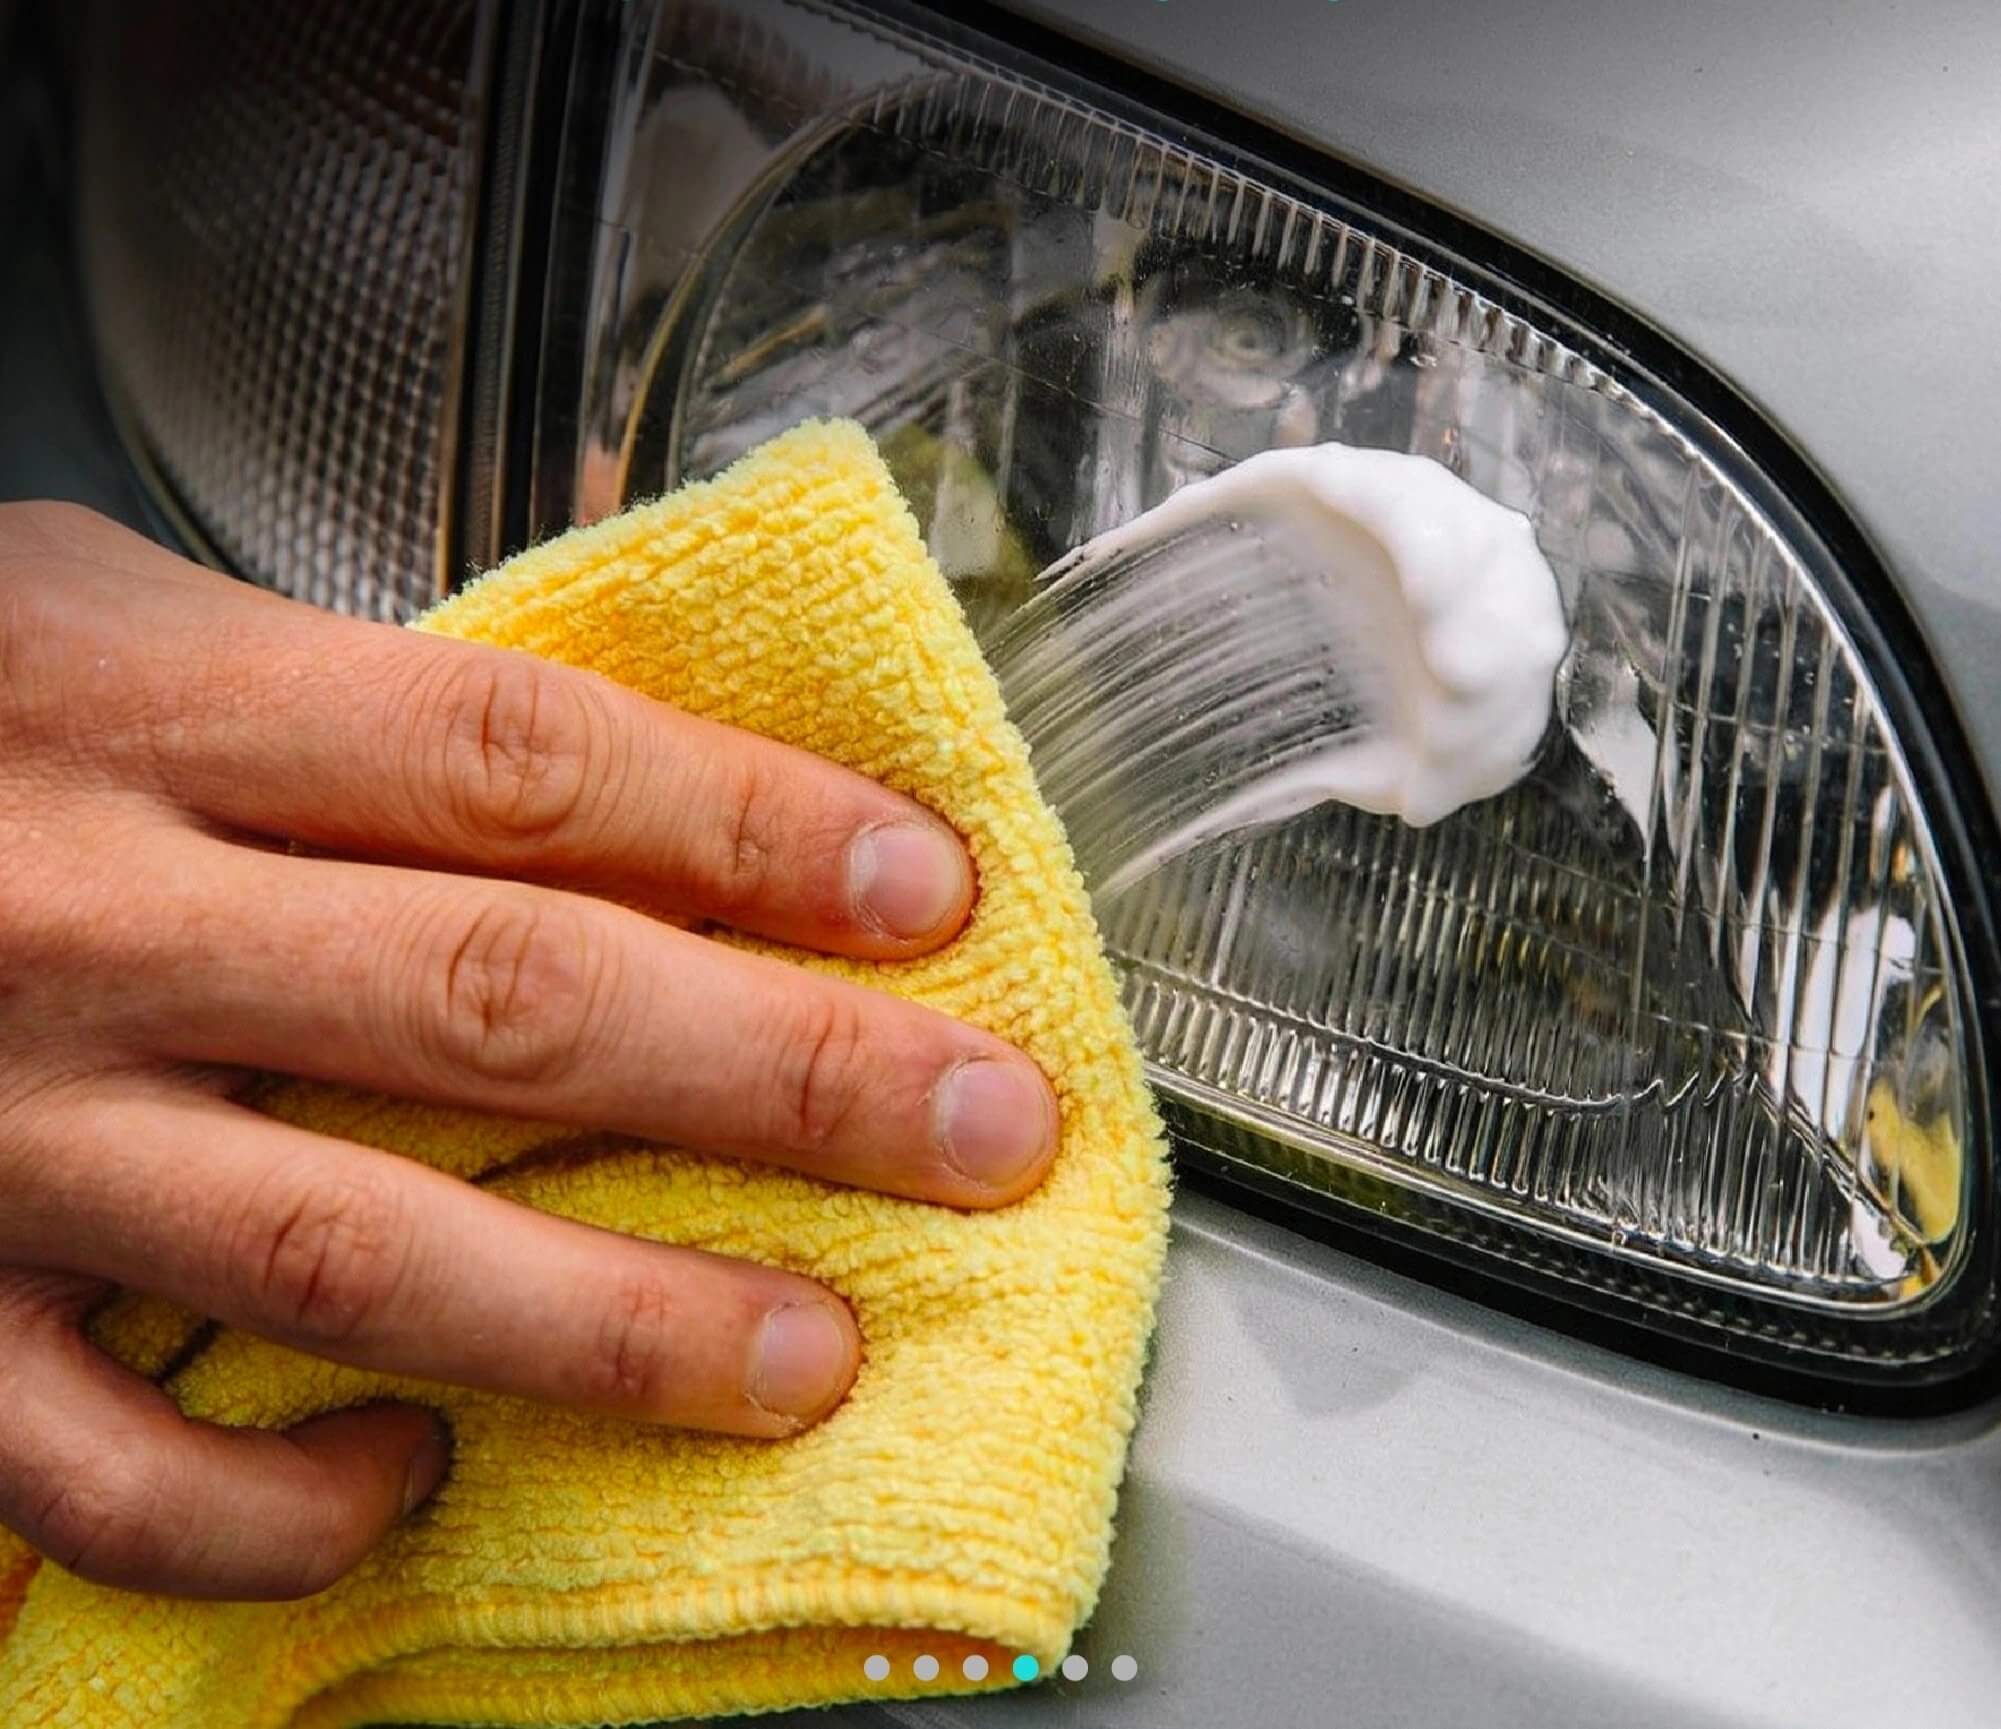
Step 4: Clean the surface
Wipe everything off completely before the next step.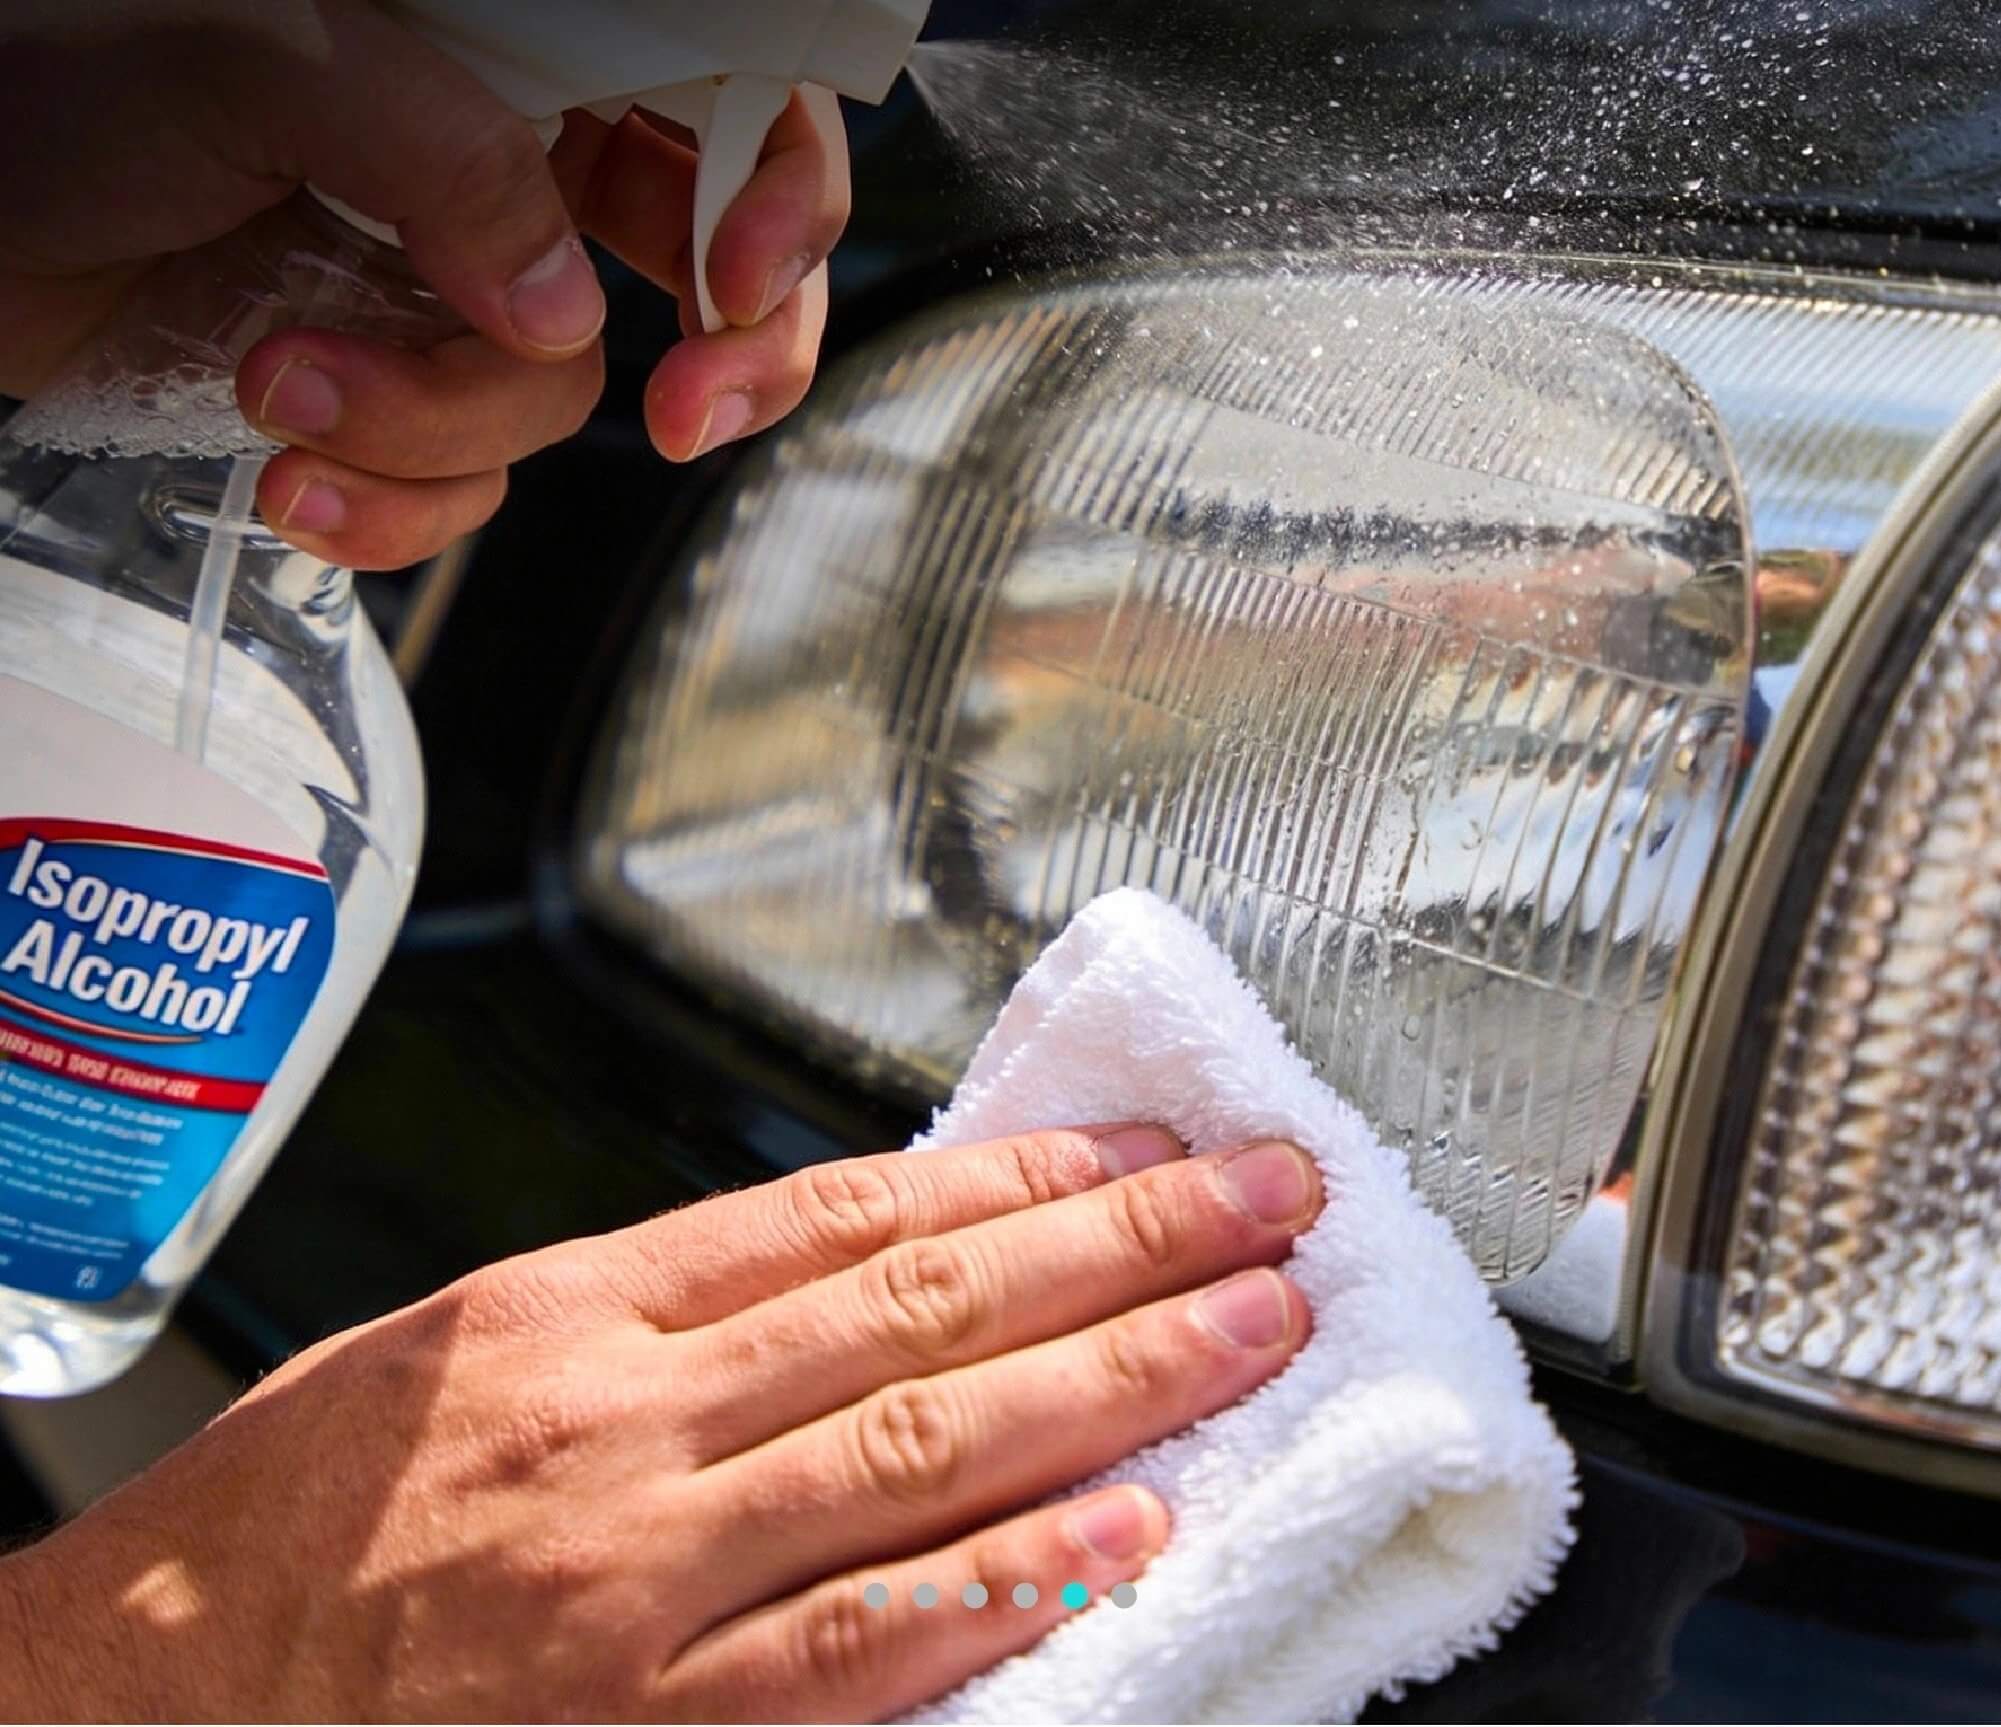
Step 5: Seal it (THIS IS THE IMPORTANT ONE)
Apply a UV sealant. This is the new “sunscreen” for your headlight. Skipping this step means your headlight starts going yellow again almost immediately.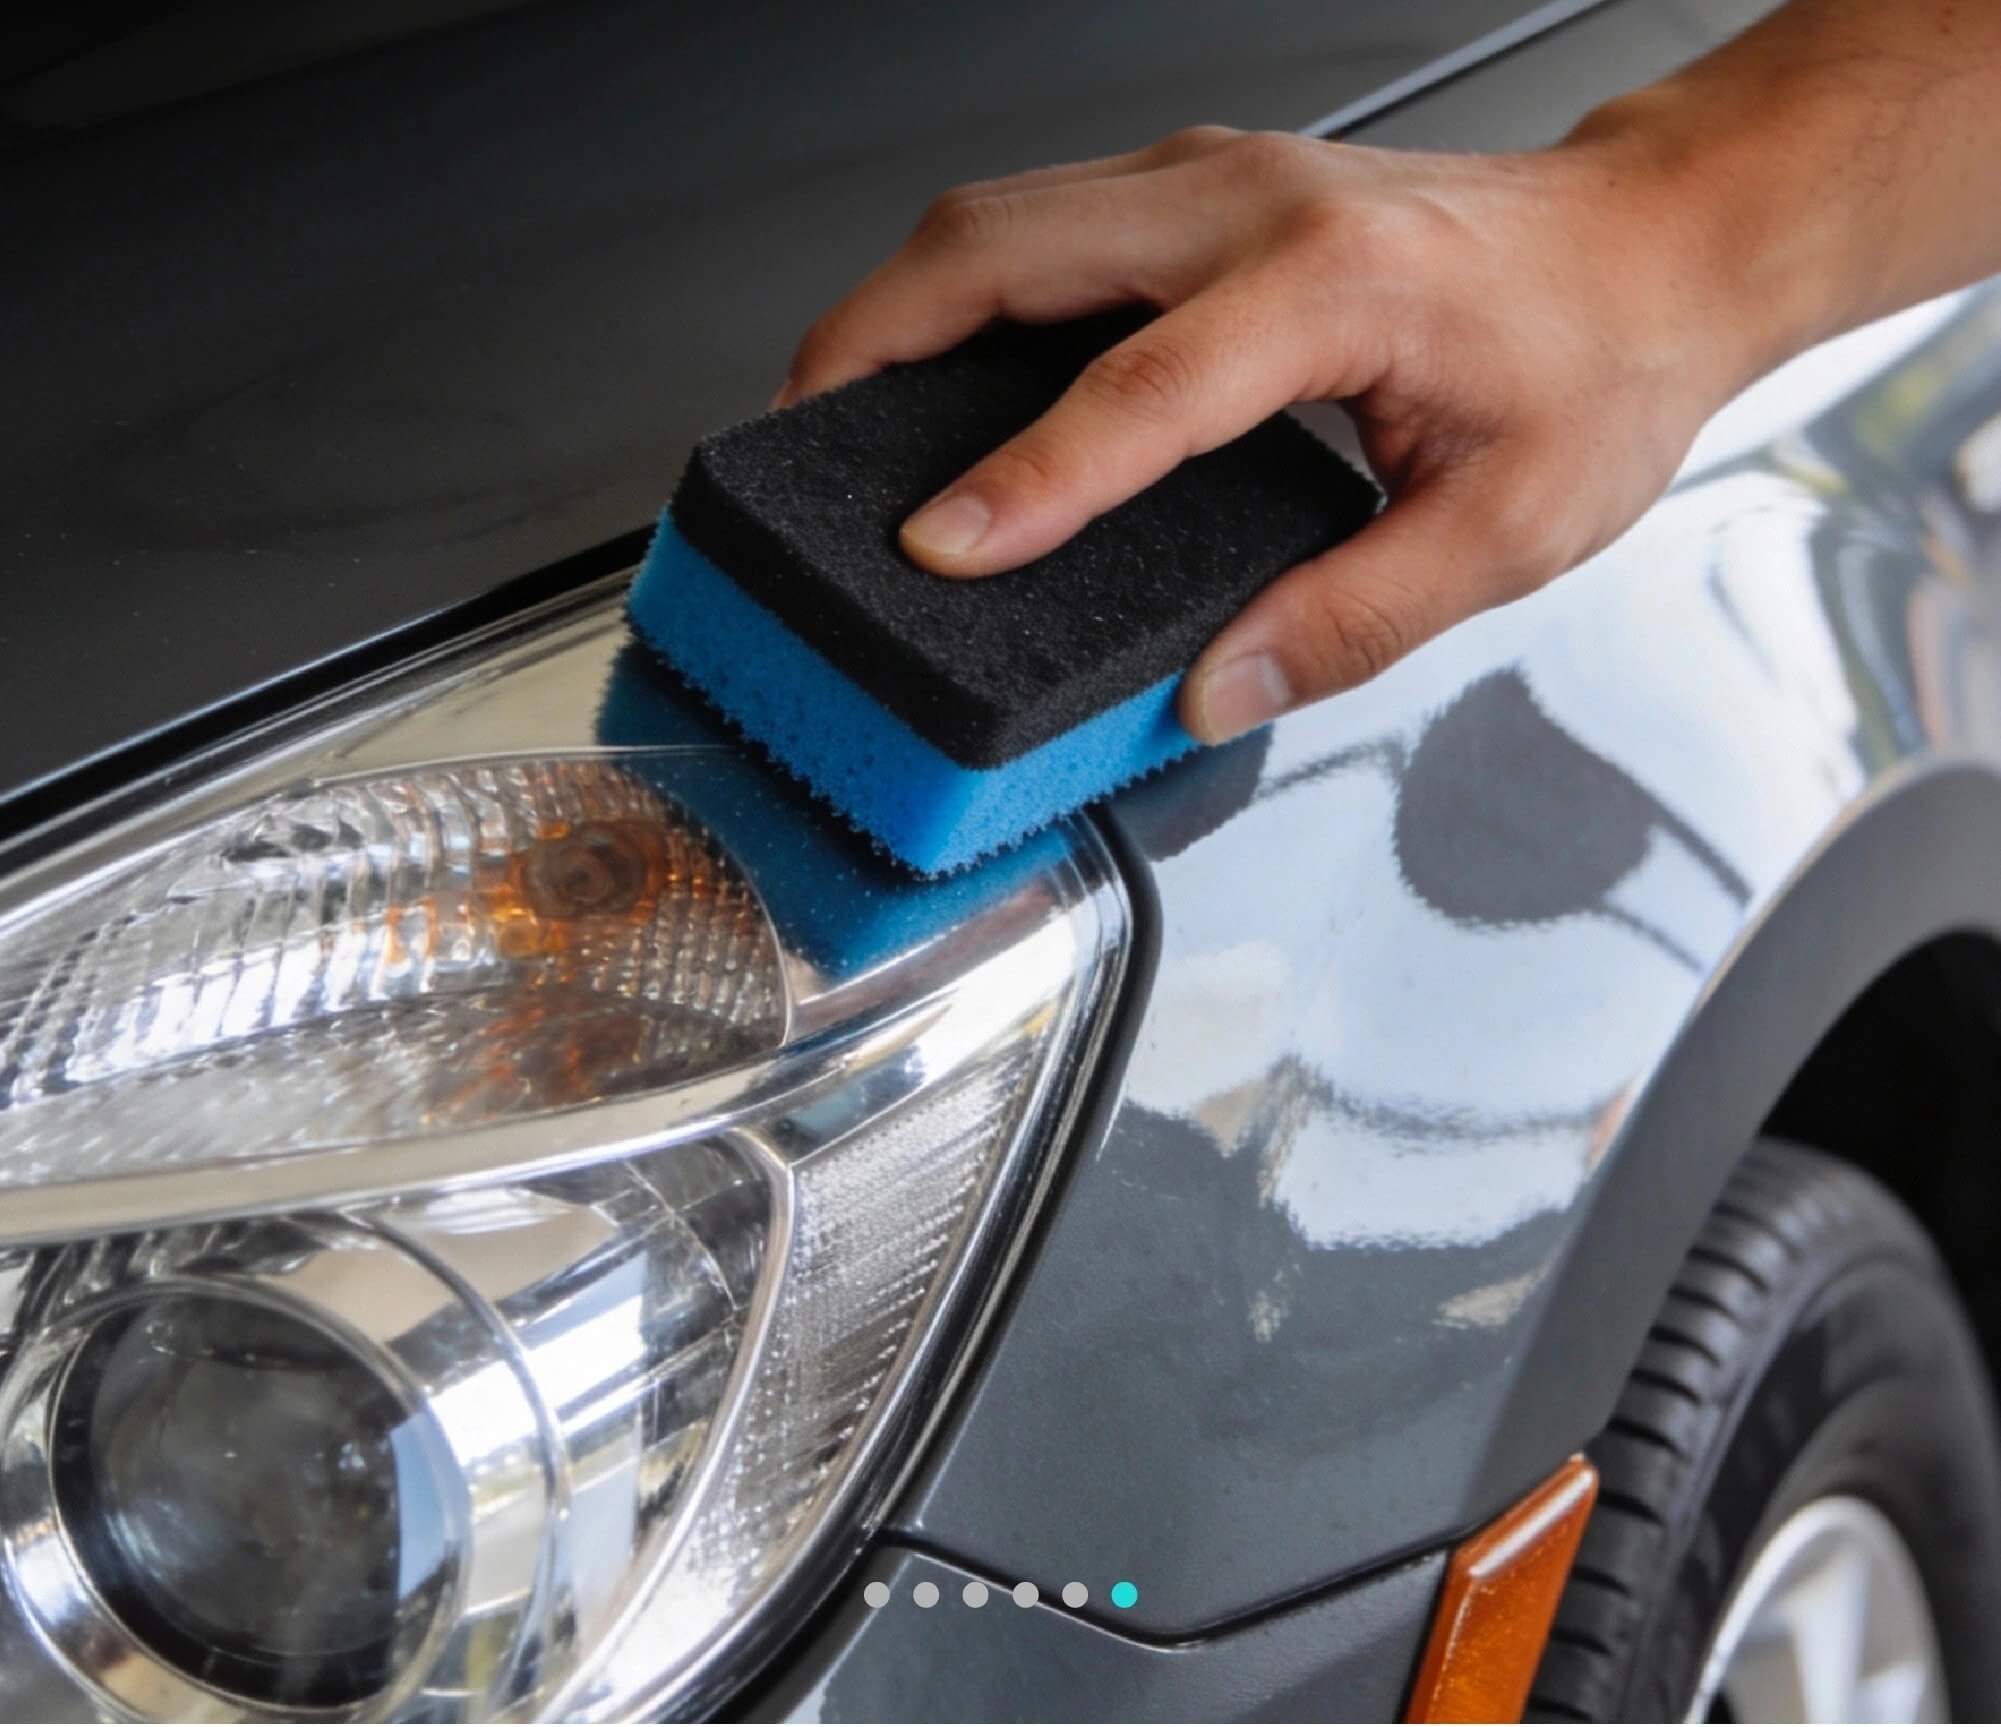
The UV sealant step is usually where most DIYers go wrong. When you sand the headlight, you remove the damaged surface and expose the bare polycarbonate. Without immediate and correct application of a UV-resistant coating, the headlight will rapidly begin to fog up again. Essentially, skipping this sealant step guarantees a quick return to the original problem.
|
Realistic Lifespan: When everything is done properly, the results can look very close to professional work. But like most things, how long it lasts depends on the product quality, how carefully it’s applied, and how much sun, heat, and weather the vehicle is exposed to. |
🧠 What DIY Kits Actually Get You
The secret to lasting clarity isn’t just scrubbing off the old, nasty oxidation, almost any kit can do that. It’s the protective sealant you put on after the sanding that really makes the difference in how long your headlights stay looking brand new. Every kit can handle the initial cleanup, but their real difference lies in the lasting protection they offer.
| Brand | Durability | Rating |
|---|---|---|
| Sylvania | Longest-lasting among DIY options | Top Pick |
| 3M | 12–24 months with proper sealant | Strong |
| Cerakote Ceramic | Varies by application & UV exposure | Variable |
| Toothpaste/DEET | Weeks or active damage | Avoid |
The common thread: the UV sealant in step 5 is the entire ballgame. Applying it correctly, to a fully cleaned and dried surface, is what separates a 6-month headlight restoration result from a 12-month one.
🚨 When DIY Isn’t Enough
A sanding kit handles surface-level clouding really well. But sometimes the damage is too far gone for a DIY fix:
-
The damage goes deep into the plastic. If sanding doesn’t clear it up, the cloudiness has gone past the surface layer.
-
Moisture is trapped inside. No kit can fix that.
-
The headlight is cracked or chipped. Cracks, chips, or spiderwebbing can’t be sanded out. They scatter light and require a serious fix.
-
A previous DIY went wrong: If someone before you (or maybe even you!) sanded unevenly or skipped the critical sealing step, you might have a surface worse than when you started.
In any of these cases, it’s time to call a professional, or consider replacing the headlight entirely.
🧑🔧 What Professional Headlight Restoration Involves
Professional headlight restoration is basically the spa day your car’s eyes desperately need. It follows the same basic steps as a DIY kit, but with better tools, better products, and someone who’s done it hundreds of times.
Here’s the full process a professional follows:
Here’s the full process a professional follows:
- 🔍 Assessment: First, they check whether it’s external oxidation (fixable) or internal moisture (needs replacement), and how deep the damage goes.
-
🎯 Masking: They tape off all the surrounding paint and trim. Basically wrapping your car in a little protective bubble.
-
🧽 Multi-stage wet sanding: Same as DIY, but done by hand and machine, evenly and consistently.
-
⚙️ Machine polishing: A powered polishing tool brings back clarity faster and more evenly than doing it by hand.
-
🛡️ UV clear coat or headlight ceramic coating application: This is the magic potion. The professional-grade version of the sealant. Much more durable than what comes in a DIY kit.
-
✔️ Final inspection: They check the work under direct light for any streaks or uneven spots.
Each headlight takes about 30 minutes, so both are done in under an hour. Compare that to the average person who spends about 14 months squinting at night and hoping the problem fixes itself.
Standard Restoration vs. Ceramic-Protected Restoration
The difference comes down to what protective coating gets applied at the end.
| Standard Restoration | Ceramic-Protected Restoration | |
|---|---|---|
| Process | Sanding + polishing + spray-on UV sealant | Same process with a ceramic coating applied over the polished lens. Harder, more chemically resistant UV barrier |
| How long it lasts | 1–2 years | 2–3+ years |
| Approx. Cost (per pair) | $60–$150 | Up to $200+ |
What’s a ceramic coating? It’s a liquid protective layer that hardens on the surface and forms a tough, long-lasting shield. It’s stronger than a regular sealant and resists UV rays, chemicals, and heat much better.
| Honest note: Waxes provide only temporary UV protection, and many consumer-grade ceramic coatings are not specifically formulated for long-term performance on polycarbonate headlights. In professional headlight restoration, more advanced UV-resistant hard coats or dedicated lens protection systems are typically used to deliver longer-lasting clarity and durability. The quality of the product used in step 5 matters as much as the sanding process itself. Worth asking about when booking. |
Headlight Restoration Methods: Cost vs Lifespan 💸⏳
How long does headlight restoration really last? The results vary significantly depending on the method, product quality, and environmental conditions. Here’s a clear comparison of every method, from the free hack your neighbor swears by, to a full replacement:
| Method | Est. Duration | Approx. Cost | Best For |
|---|---|---|---|
| Toothpaste / baking soda | 1–4 weeks | $0–$5 | Very light clouding, temporary fix |
| DIY wet-sanding kit | 6–12 months | $10–$30 | Moderate oxidation, budget repair |
| Professional (standard restoration) | 1–3 years | $60–$150 per pair | Long-term clarity with UV protection |
| Professional + ceramic coating | 2–3+ years | Up to $200+ per pair | Maximum durability and UV resistance |
| Full OEM replacement | New lifespan reset | $300–$700+ (up to $2K+ luxury) | Cracked, sealed, or internally damaged headlights |
San Diego note: Because of the extreme UV here, results may not last as long as national averages. Cars parked outside near the coast age faster than garaged ones.
How to Make Results Last Longer
A few habits extend the life of any restoration significantly:
- 🌳Park in the shade when you can. Yes, finding shade in San Diego is its own challenge. But even partial shade helps.
- 🚫Skip the automatic car wash tunnel. The stiff brushes and strong soaps strip away the UV coating faster than hand washing.
- 🧽Keep up with regular detailing. Mild buildup is easier to deal with than full-blown oxidation.
- ⚠️Avoid harsh chemical cleaners on your headlights. “Extra cleaning power” often means “strip the coating off faster.”
| PS: If you’re on Club Clean, headlight cleaning is part of your regular maintenance (not a full headlight restoration), but it does help slow down that foggy build-up and keep results lasting longer. |
Headlight Restoration Cost
Headlight restoration cost varies a lot depending on whether you DIY it or hire a pro. Here’s a quick recap of what you’re looking at financially:
- DIY kit: $10–$30
- Professional restoration (per pair): $60–$150
- Professional + ceramic coating: Up to $200+
- Full headlight replacement: $300–$700 for standard vehicles, $2,000+ for luxury or LED setups
If you’re thinking long-term, three professional restorations over nine years costs roughly $450. One full replacement can run $800 or more. Restoring almost always makes more financial sense, unless the headlight is physically damaged or has moisture inside.
Restore or Replace: How to Decide
| ✔️ Restore if… | ❌ Replace if… |
|---|---|
|
|
|
Rule of thumb: If it looks like it survived a zombie apocalypse, replacement might be the move. When in doubt, a professional assessment can quickly tell you if your headlights can be restored or need replacement |
⚠️ The Safety Problem Nobody Talks About
Foggy headlights aren’t just a “your car looks a little tired” situation. They’re more like a “why is everything suddenly harder to see at night?” situation.
Here’s what the data actually says:
- AAA found (2018) that badly oxidized headlights only produce about 22% of the light output of new headlights on low beam. A professional restoration brings that back up to about 70%.
- The IIHS (the group that crash-tests cars) found that vehicles with better headlight ratings have 19% fewer nighttime crashes involving just one car, and 23% fewer crashes involving pedestrians at night.
- NHTSA (the national road safety agency) reports that about 50% of traffic deaths happen at night, even though only about 25% of driving happens after dark.
So basically your headlights are not ‘a little foggy’… they’re running on night mode with 30% battery and no charger.
🔄Before and After: Real San Diego Restorations
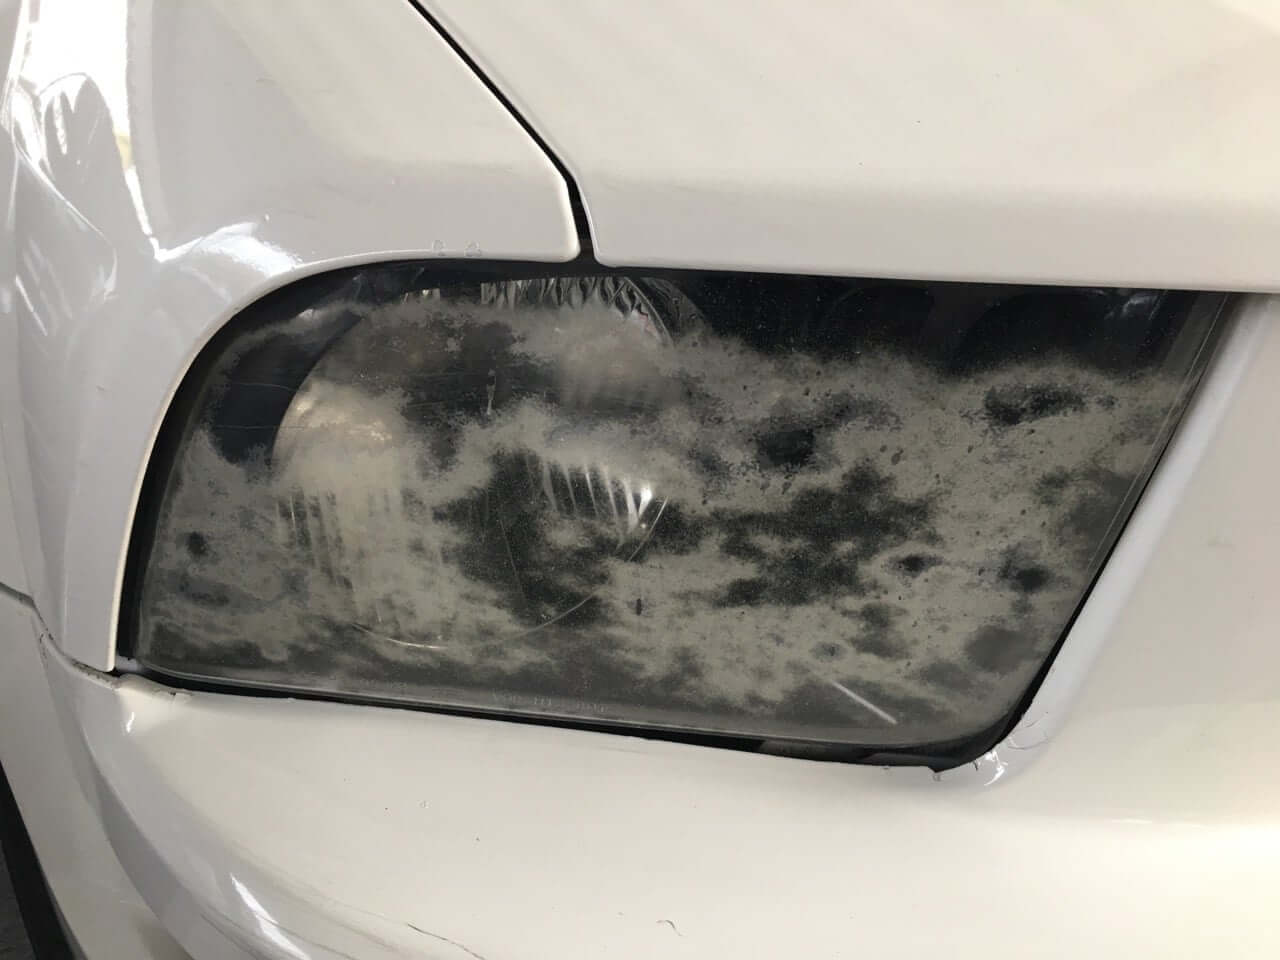
The two headlight restoration examples below show what results actually look like at different stages of oxidation. Both are real vehicles that received headlight restoration service in San Diego.
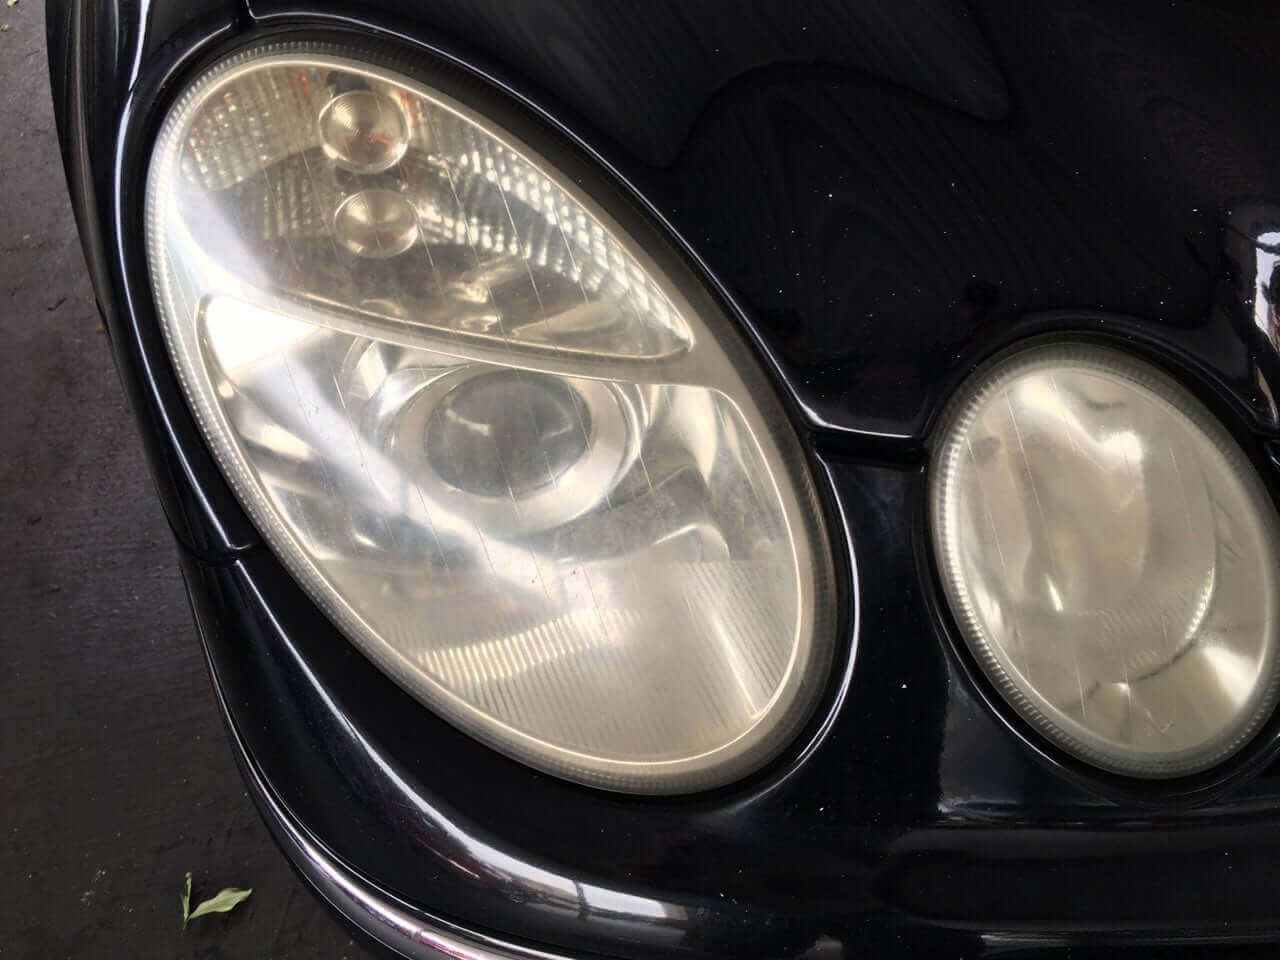
Restoration 1: Moderate Oxidation
 |
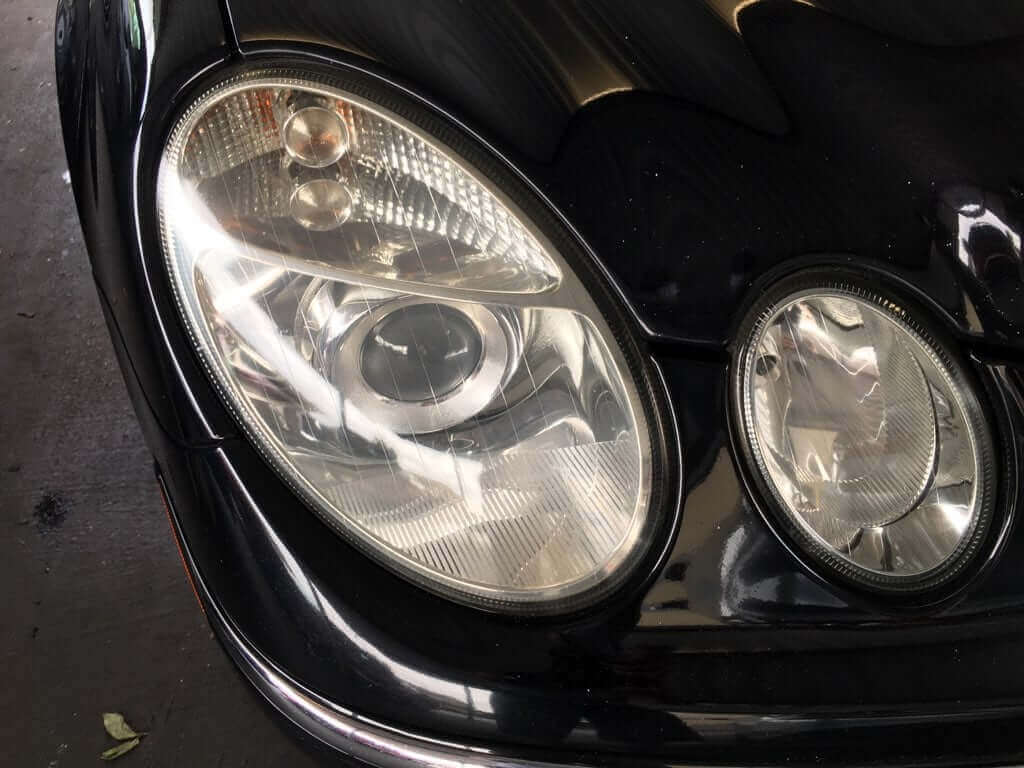 |
At this stage, headlights are just starting to show their age, with visible yellowing and a little light hazing, but nothing deep or pitted yet. This is the sweet spot for restoration. The damage is still just on the surface, so the job is quick, and once we put a good UV sealant on, it’ll stay nice and clear for a long, long time.
Restoration 2: Severe Oxidation
 |
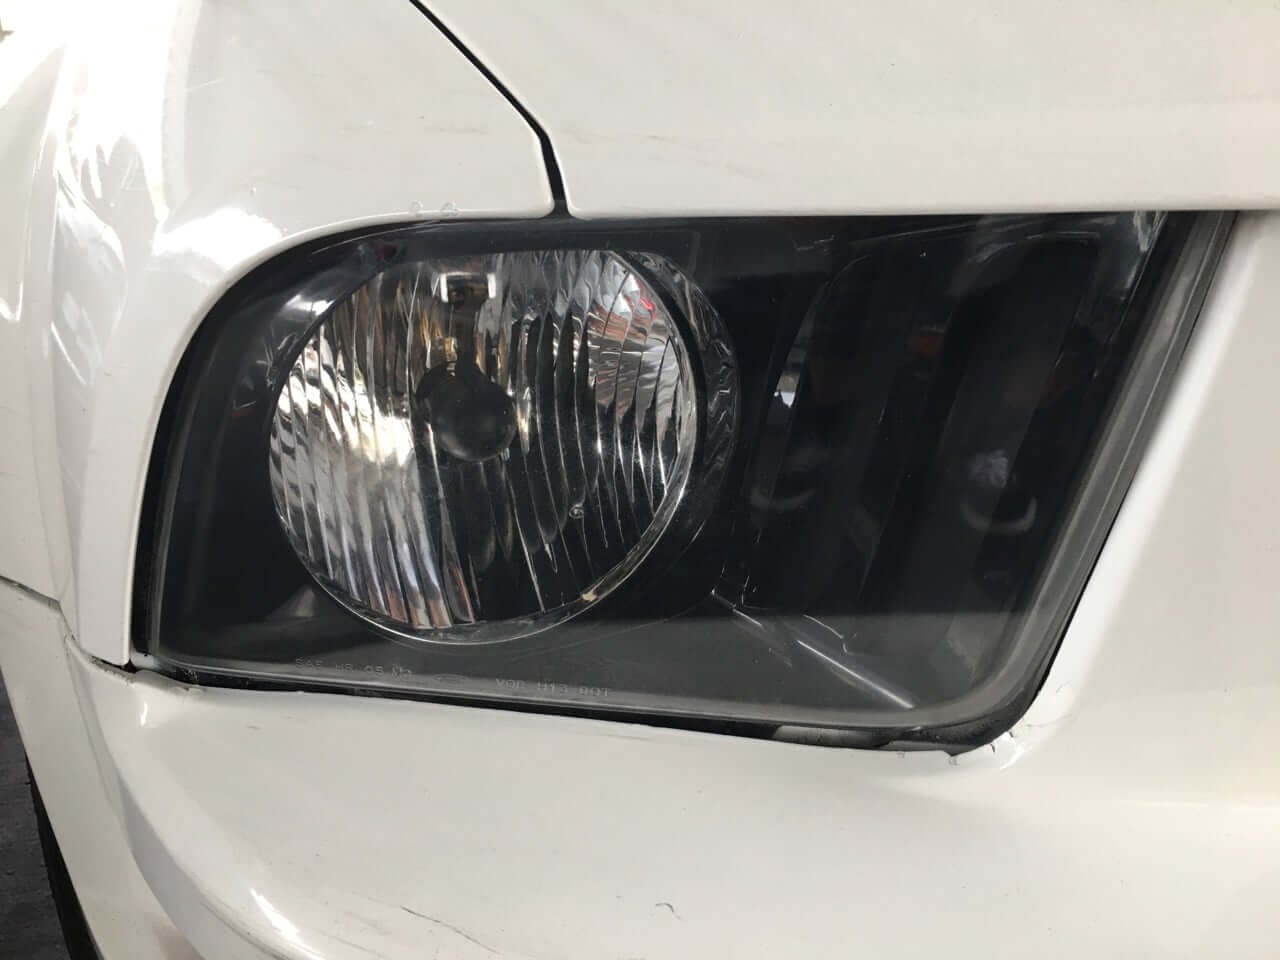 |
When headlights get really bad with yellow, tiny surface cracks, and light going everywhere, that’s severe oxidation. Getting them looking new again takes more time and some serious sanding. For this level of damage, the shine lasts way longer if we use a ceramic coating instead of just a regular UV sealant.
|
The difference is usually dramatic enough that people think the headlights were replaced. They were not. Just rescued. |
🚗✨Book Your Headlight Restoration in San Diego
Ready to actually fix the foggy headlights instead of thinking about it for another 14 months?
Mobile headlight restoration in San Diego means a detailing professional comes directly to your home, office, or wherever your car is parked. No drop-off. No waiting room. No rearranging your whole day.
👉 Book a Headlight Restoration
FAQs
How long does headlight restoration the process take?
A professional headlight restoration takes approximately 30 minutes per headlight, so both headlights on a standard vehicle are typically done in under an hour. With mobile service, a detailing professional comes to your location in San Diego, your home, office, or wherever your car is parked. So there’s no drop-off time or waiting room. A DIY headlight restoration kit typically takes 45 minutes to an hour per car if you follow the full wet-sanding and sealing process correctly.
Can foggy headlights be fully restored to clear?
Yes, in most cases. If the cloudiness is on the outside surface of the headlight, it can be sanded off and polished back to clear. The key is sealing it properly after so it doesn’t go foggy again quickly. The only cases where restoration won’t fully work is if the plastic has deep cracks, or if moisture is trapped inside the headlight housing.
Is headlight restoration worth it?
Almost always yes. A professional restoration runs $75 to $150 for the pair. Replacing both headlights can cost $300 to $700 or more, and luxury or LED setups can go well over $1,000. Restoration also takes less than an hour and doesn’t require removing anything from your car.
How do I know if my headlights need restoration or replacement?
Run your finger across the headlight. If it feels rough or gritty, the damage is on the surface and restoration will work. If it feels smooth but still looks foggy, moisture is likely trapped inside and you’ll need a replacement or seal repair. Cracks, chips, or deep yellowing that doesn’t improve with sanding are also signs that replacement makes more sense.
How often should I get headlight restoration?
It depends on how your car is stored and how much sun it gets. For most San Diego drivers parking outside, every 1 to 2 years is realistic for a professional restoration. If you’re on Club Clean, regular headlight cleaning between restorations helps slow down the buildup so you’re not starting from scratch each time.
Does headlight restoration work on all cars?
It works on any car with polycarbonate headlight covers, which is basically every car made in the last 25 or so years. The process is the same regardless of make or model. The only variable is how deep the damage has gone and whether there’s internal moisture, which is assessed before any work starts.